Creating a free blogging system: a quick guide
Just in case anyone else wants to piggybank on the system described here, here’s a quick guide documenting the major setup steps and some gotcha moments.
It is not meant as a complete follow along tutorial, and it assumes that you have some knowledge and understanding of how web generally works.
Prerequisites
- Netlify account for hosting
- Google/Firebase account for a hacky subscription mechanism
- GoatCounter account for analytics
- GitHub account and repository for version control
- Hugo installed locally - for building the static files
Do this, then do that
1. Repo setup
Have a local git repository up & running, synced with a publicly accessible one (this is mine).
It can also be a source of inspiration for various settings and tweaks that I did to some of the Hugo / Hugo-theme that I use. Feel free to explore :)
2. [Optional] Hugo setup
Update config.toml so that the baseURL’s value is /. This way, no code updates are necessary if you decide to change any DNS settings later. Btw, the last step was to complete the DNS setup, so I just followed this simple yet efficient guide. (Thanks, Ezekiel!)
No need to worry about not owning a domain name yourself, this free 😎 guide is free-to-follow as well. We are not going to change the website name settings in Netlify; instead, we’re just going to use whatever random URL they generate.
3. [Test] Manually upload to netlify
With a basic Hugo blog in place (for example, I’m using this), we can generate the static HTML files and upload them just to test everything is alright and get the public URL for the site.
Generate the static files locally using:
hugo
Upload the files manually: the public directory - that’s where Hugo generates the static website by default. Check out your live website and save the URL generated, we’re going to use it in just a moment in the GoatCounter and Firebase setups.
4. Setup GoatCounter
For the GoatCounter setup, follow the sign-up process, using the URL generated earlier by Netlify. Make sure you add the link to the <script> that GoatCounter sent via email.
The Maverick theme customized the Hugo partial head.html and I don’t really want to spend a lot of time figuring out how to extend it properly.
An ugly hack, for now: I will copy the entire file and add the link to the script inside.
5. Setup Firebase
In the Firebase Console, create a new project. I’m naming mine costica-dev-firebase-auth.
Uncheck Google Analytics. Click “Authentication” and select the Email/Password provider.
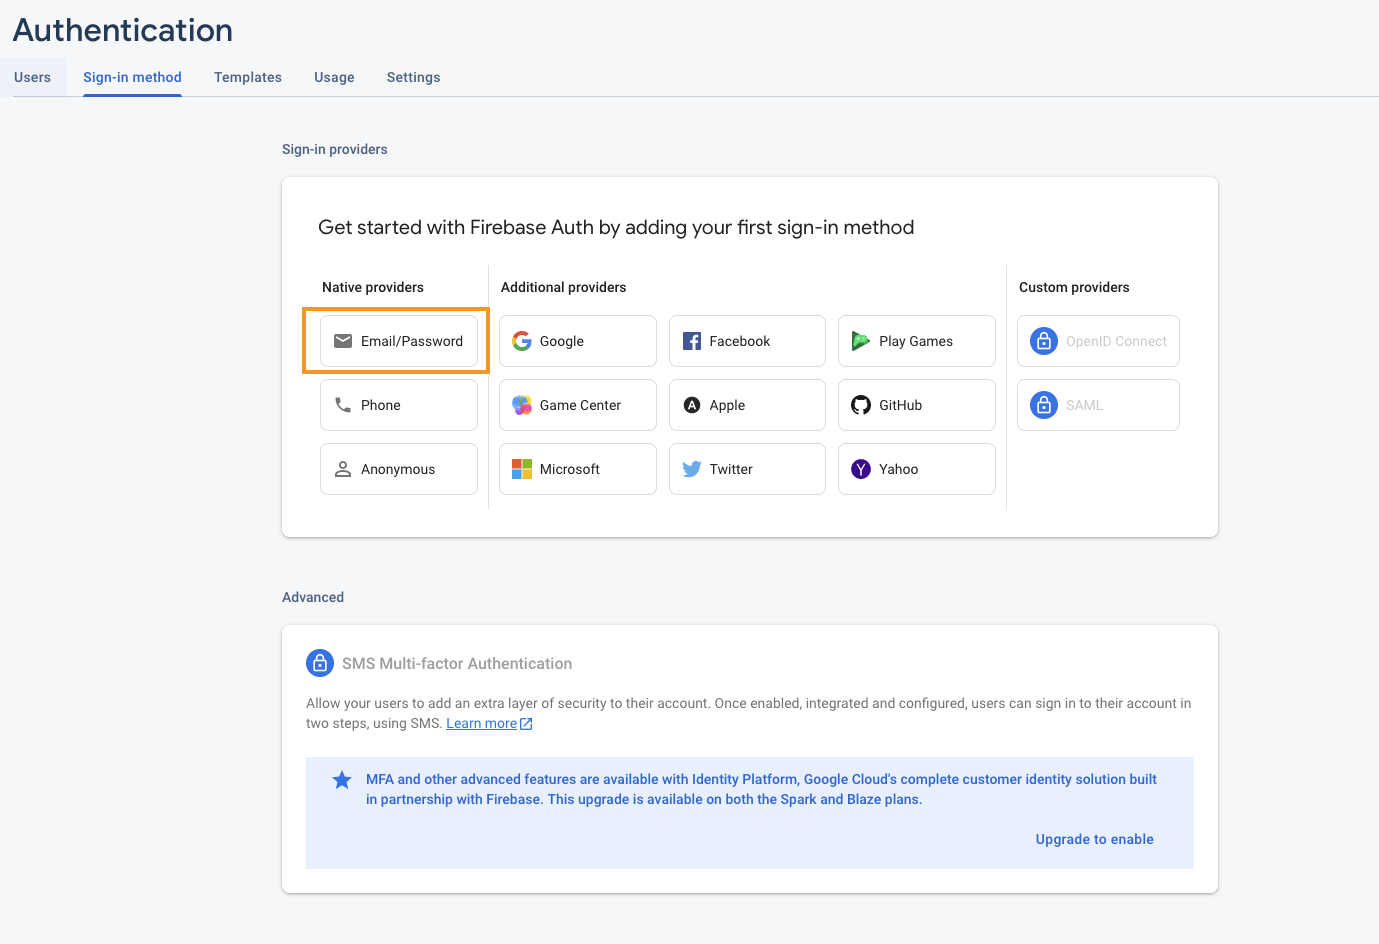
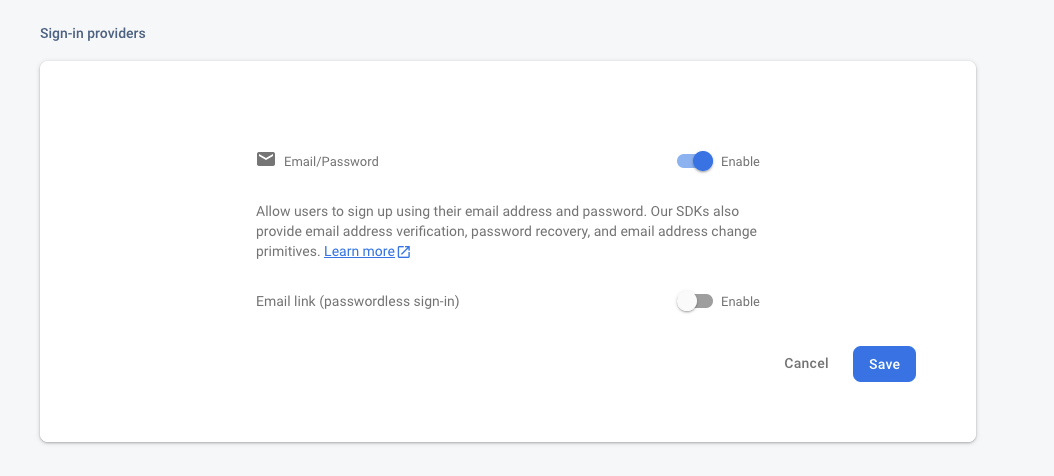
Then check the Email/Password and click Save.
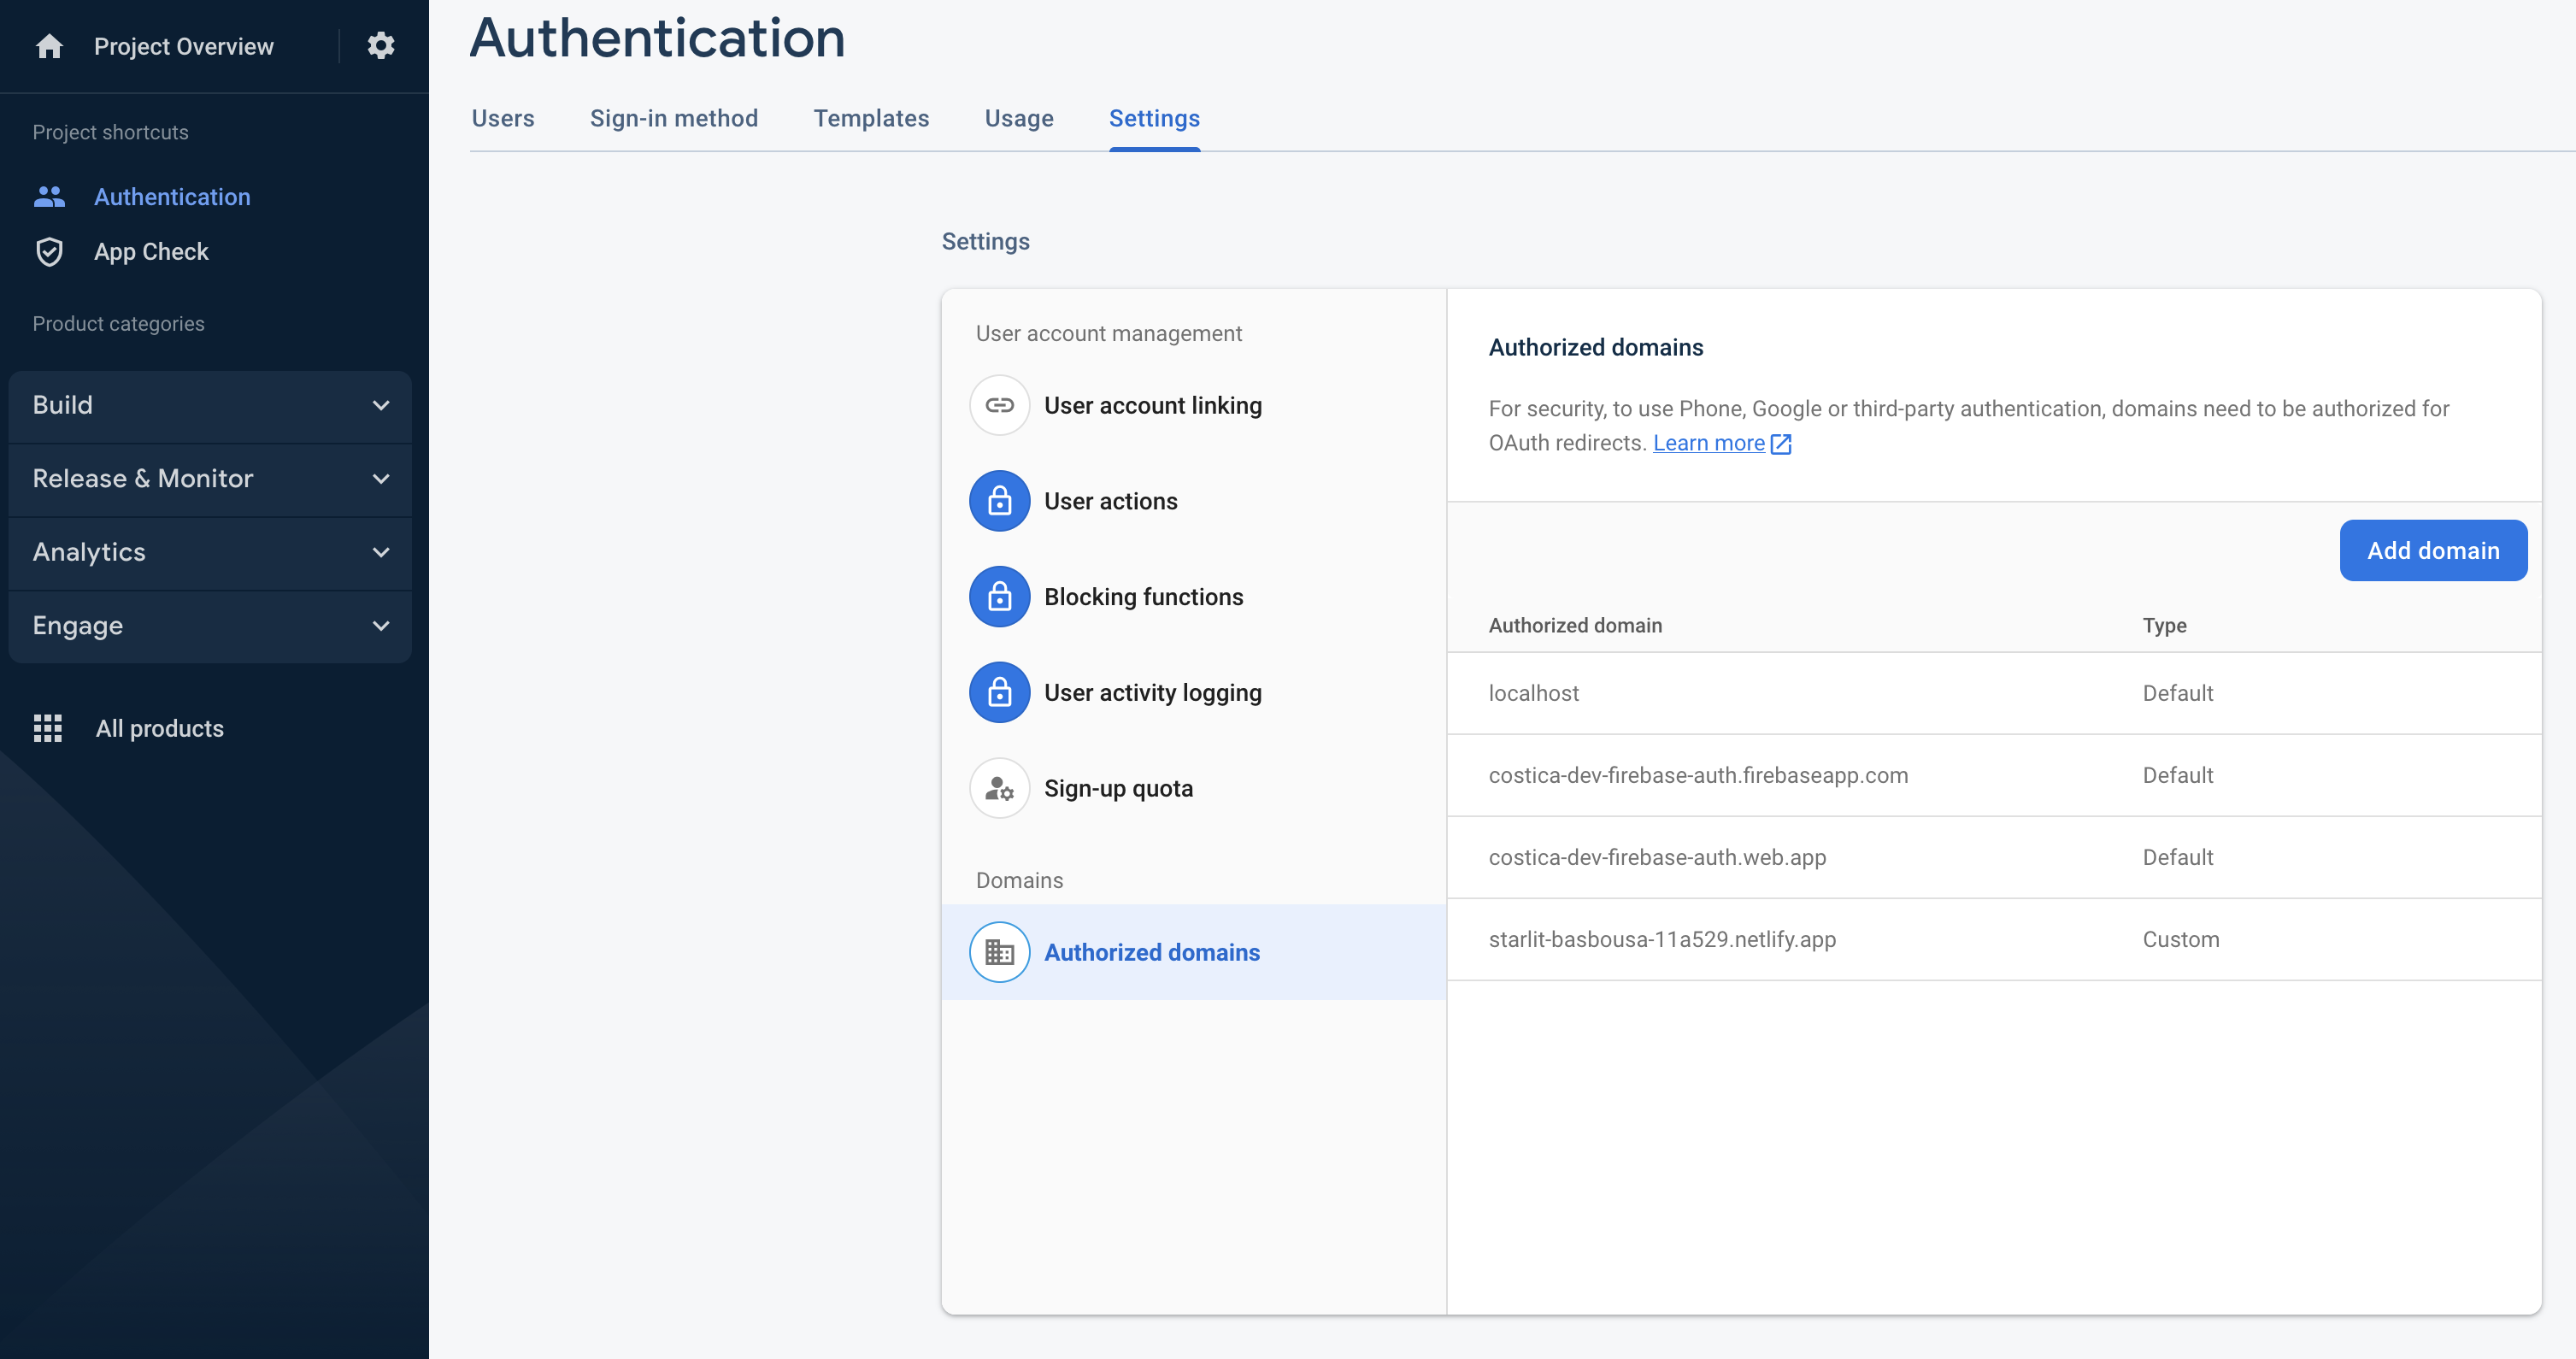
Add the domain name (that you have set up in Netlify) in the Settings/Authorized Domains section.
Last, from the project settings, add a new app to your project:
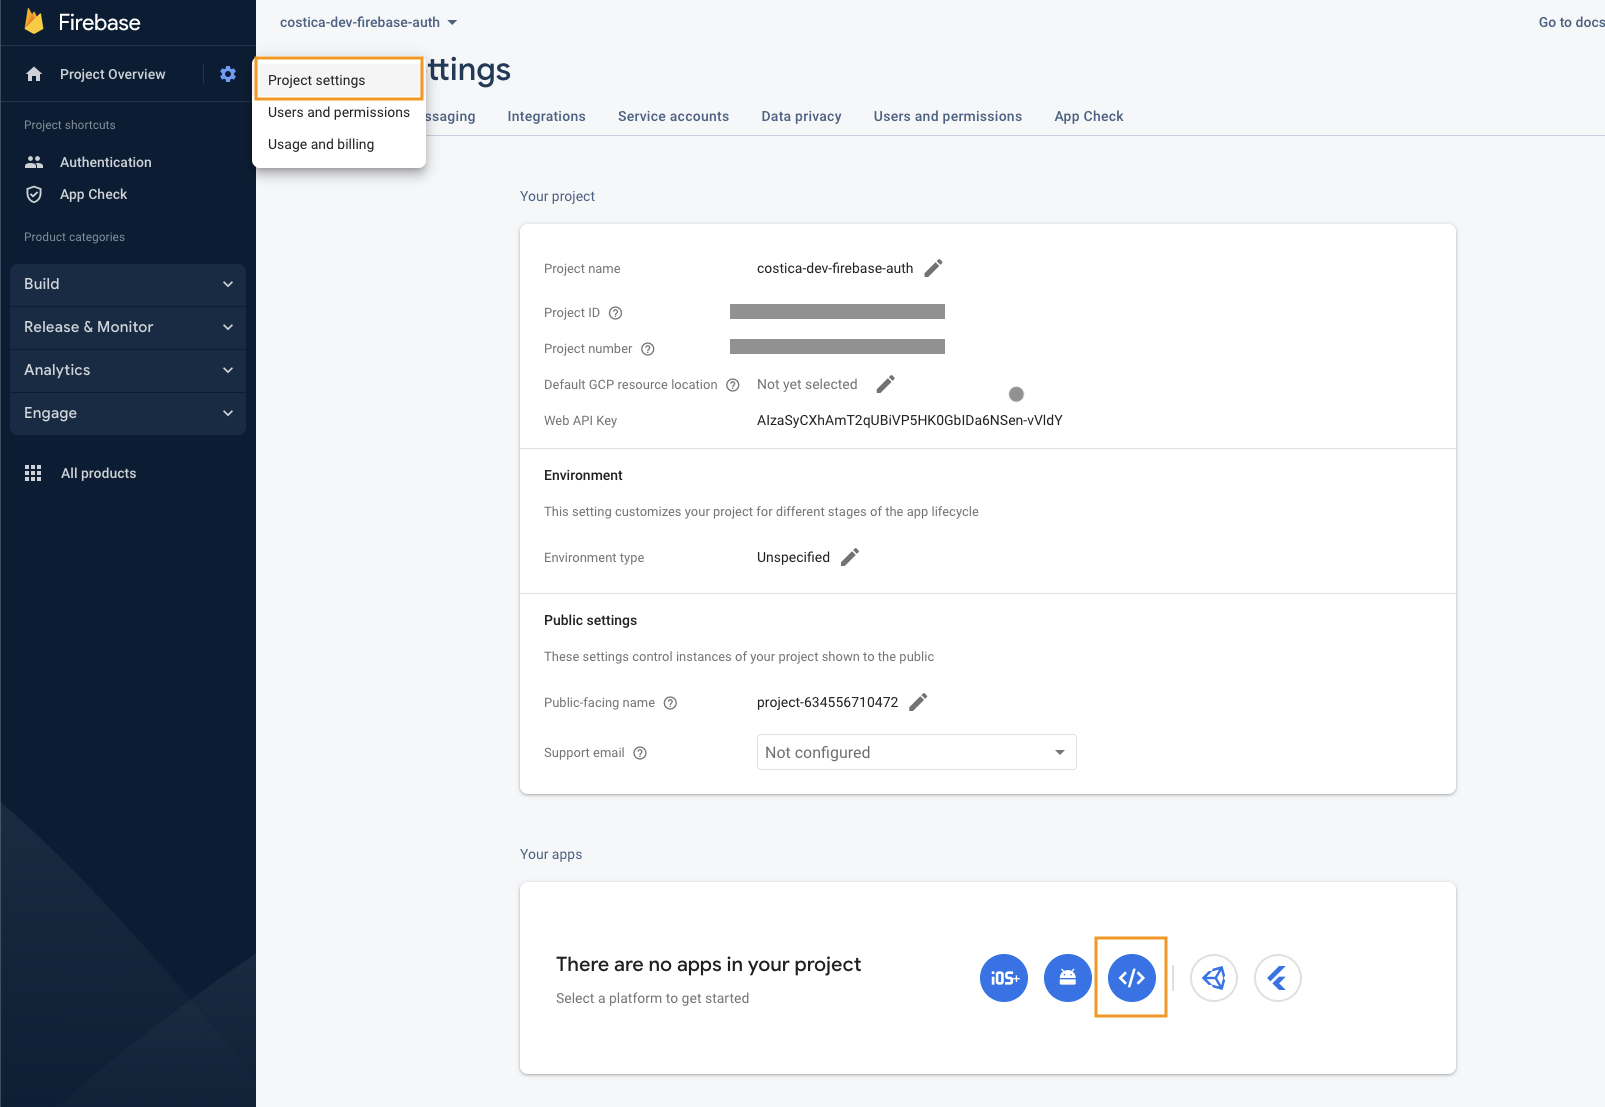
Select an app name, but don’t check the Firebase Hosting option.
Copy the firebaseConfig, but don’t bother with the rest of the settings.
As per Firebase’s docs, although very obscure, the 9.15.0 version of the firebase-app does not really work when you try to use it with firebase-ui-auth and import it directly from a CDN.
I lost some time on this with no luck - and I ended up “downgrading” to version 8.7.0.
On top of that, adding this in Hugo markdown is not a pleasure either. I won’t rant here about it - what I ended up doing is creating two Hugo shortcodes:
- One (
firebase_load_library) to import the library and instantiate it:
<script src="https://www.gstatic.com/firebasejs/8.7.0/firebase-app.js"></script>
<script >
  const firebaseConfig = {
    ....
  };
    const app = firebase.initializeApp(firebaseConfig);
</script>

<script src="https://www.gstatic.com/firebasejs/8.7.0/firebase-auth.js"></script>
<script src="https://www.gstatic.com/firebasejs/ui/6.0.1/firebase-ui-auth.js"></script>
<link type="text/css" rel="stylesheet" href="https://www.gstatic.com/firebasejs/ui/6.0.1/firebase-ui-auth.css" />

<script>
var ui = new firebaseui.auth.AuthUI(app.auth());
</script>
Yes, the order in which they are being loaded matters… so script cascading for the win.
- Another (
firebase_subscribe) to output the button that initializes the “subscription” (sign-up, actually) mechanism:
<div id="firebaseui-auth-container">
<button id='show-firebase-ui'>Subscribe!</button>

<script>
var uiConfig = {
  callbacks: {
    signInSuccessWithAuthResult: function(authResult, redirectUrl) {
      alert('All good! Will (maybe) keep you updated!');
      return false;
    },
    uiShown: function() {
      document.getElementById('loader').style.display = 'none';
    }
  },
  // Will use popup for IDP Providers sign-in flow instead of the default, redirect.
  signInFlow: 'popup',
  signInOptions: [
    {
        provider: firebase.auth.EmailAuthProvider.PROVIDER_ID,
        requireDisplayName: false,
     },
  ],

  // Terms of service url.
  // tosUrl: '<your-tos-url>',
  // Privacy policy url.
  // privacyPolicyUrl: '<your-privacy-policy-url>'
};

document.getElementById("show-firebase-ui").onclick = function () {
    ui.start('#firebaseui-auth-container', uiConfig);
};

</script>
</div>
I tested this code in a previous PoC when I explored Hugo and validated the Hugo - Netlify - Firebase shenanigans. As a logical person, however, I have basically 0 confidence that my copy-paste works without any issues. So let’s test it out.
First, I need to create a new page that will contain the Firebase shortcodes, and with some explanation of how the subscription mechanism works.
Btw, if you want to test how this works, here’s the page. Yes, this actually tricks you into making you subscribe.
6. Pipeline setup
So, we have a working static site generator with a VCS (git), analytics, and subscription system.
Up until this point, we generated the static HTML files manually, by calling hugo. Then manually uploaded the public directory to netlify.
We’re not apes. We can do better.
As per the Netlify docs, go to https://github.com/apps/netlify and install their app, giving it access to the repository containing the blog. Then link the site created earlier with the GitHub repository that contains the blog.
Luckily (or well done, Netlify!) the default settings work out of the box: build command - hugo and publish directory public are the default settings and they are pre-completed.
Let’s test it out with one more commit… aaaaand it seems like it does indeed work out of the box.
Pipeline caveats
However, I’m not entirely satisfied yet:
- What happens with the stale files in the
publicdirectory? Hugo doesn’t do so by default, and its CLI option doesn’t always work. I assume it does a clean build as it would be simpler forNetlifyto do so. But I couldn’t find anything in their docs to confirm. - What if I (somehow?!) manage to run out of build minutes?
Netlifyprovides 300 per month - it is absurd that I would ever need more, but still a “minus” for the current solution. Netlify’s app behavior is to redeploy every single time I push a new commit toGitHubon the selected branch. While creating a newdeploybranch that I can merge withmasteris an option, I would like something simpler: why wouldn’t I deploy only when, say, the commit title starts with something like[Article]?
Nonetheless, good enough for now.
That’s it. If you followed along, you should now have a publicly accessible blog that is being updated each time you push a commit into your GitHub repository.
Closing notes
Hopefully, this provides a good-enough guide so that anyone, or future self, can test out the free blogging system I came up with.
That was it. Hope it helps. By-bye!